Dalam beberapa bulan dan tahun yang lalu, sering ada pertanyaan dari teman-teman satu kantor. Apakah bisa kita memiliki sebuah cloud storage seperti Google Drive atau dropbox? Kebutuhannya hanya untuk menyimpan data berupa file, video, atau foto. Menurut saya sih bisa, karena sudah banyak aplikasi yang bersifat open source yang ada. Setelah saya cek di server memang banyak ternyata yang memakai cloud storage tersebut.
Seminggu lalu karena ada waktu senggang dan iseng, saya bikin sebuah lab projek terkait hal ini. Saya menggunakan Nextcloud dan menggabungkan OnlyOffice sebagai sebuah sistem yang hampir mirip dengan Google Drive. Dimana kita bisa saling melakukan editing text atau spreadsheet di dalam web.
Mari kita siapkan kebutuhan dan ekosistem untuk Nextcloud ini. Kebutuhannya adalah :
- OS Ubuntu 20.04
- PHP 7.4
- Apache
- Database Mysql
Install Apache WebServer
Fungsi dari web server adalah mengelola website yang telah online. Agar semuanya berjalan lancaar, web server berperan sebagai perantara antara mesin server dan klien. Web server menarik konten dari server pada setiap permintaan user dan mengirimkannya ke web.
Untuk install mari kita jalankan perintah
apt update -y
apt install apache2 -y
Secara default apache2 sudah berjalan otomatis setelah di install dan untuk melihat status apache2 berjalan dapat lihat dengan perintah berikut
systemctl status apache2
Apabila di status apache2 tidak berjalan, maka dapat di jalankan perintah dibawah ini.
systemctl start apache2
Install PHP 7.4
Untuk php 7.4 pada OS Ubutu 20.04 sudah dapat langsung diinstall tanpa repository tambahan. Pertama lalukan update pada OS
apt update -y
apt install php
Dilanjutkan dengan install php script.
apt install php php-cli php-fpm php-json php-pdo php-mysql php-zip php-gd php-mbstring php-curl php-xml php-pear php-bcmath php-mysqli -y
Secara otomatis php yang terinstall adalah php 7.4
Install Mysql Database Server
Install Mysql-Server sebagai database:
apt install mysql-server -y
Memberikan password untuk database
mysql_secure_installation
Akan muncul pertanyaan
Enter current password for root (enter for none): <-- press enter
Set root password? [Y/n] <-- y
New password: <-- Enter the new MariaDB root password here
Re-enter new password: <-- Repeat the password
Remove anonymous users? [Y/n] <-- y
Disallow root login remotely? [Y/n] <-- y
Reload privilege tables now? [Y/n] <-- y
Masuk ke database melaui command berikut ini.
mysql -u root -p
Setelah semua ekosistem telah disiapkan kita lakukan proses selanjutnya
Download Nextcloud
Login ke server dan lakukan perintah berikut ini
cd /home
wget https://download.nextcloud.com/server/releases/nextcloud-22.2.0.zip
apt install unzip -y
unzip nextcloud-22.2.0.zip
Pindahkan file hasil unzip nextcloud ke folder apache di /var/www/html
mv nextcloud /var/www/html/
Ubah permisi di folder nextcloud ke www-data sehingga apache2 bisa melakukan write/read. Lakukan perintah sebagai berikut
chown -R www-data:www-data /var/www/html/nextcloud/
Create Nextcloud
Masuk ke database dengan menggunakan root akses
sudo mysql -u root -p
Buat database untuk Nextcloud
CREATE DATABASE Nextclouddb;
Buat user untuk database supaya bisa login ke database
CREATE USER 'nextclouduser'@'localhost' IDENTIFIED BY 'NextcloudPwd';
Setelah membuat hak akses ke user, kita lakukan pemberian privileges untuk database tersebut
GRANT ALL PRIVILEGES ON NextcloudDB.* TO'NextcloudUser'@'localhost';
Reload Database dan Exit
flush privileges;
exit
Create Apache Virtual Sever for Nextcloud
Buat file nextcloud.conf di /etc/apache2/sites-available/
nano /etc/apache2/sites-available/nextcloud.conf
Copy the text below and replace dixmata.com with your domain name. Then Save Ctrl + X select Y then Enter
Salin teks di bawah ini, lalu save dengan menekan Ctrl + X pilih Y kemudian Enter
<VirtualHost *:80>
DocumentRoot "/var/www/html/nextcloud"
ErrorLog ${APACHE_LOG_DIR}/nextcloud.error
CustomLog ${APACHE_LOG_DIR}/nextcloud.access combined
<Directory /var/www/html/nextcloud/>
Require all granted
Options FollowSymlinks MultiViews
AllowOverride All
<IfModule mod_dav.c>
Dav off
</IfModule>
SetEnv HOME /var/www/html/nextcloud
SetEnv HTTP_HOME /var/www/html/nextcloud
Satisfy Any
</Directory>
</VirtualHost>
Aktifkan konfigurasi diatas dengan cara
a2ensite nextcloud.conf
Kemudian kita reload web servernya
systemctl reload apache2
Enable NextCloud and Rewrite Module Apache2 (Install Nextcloud Ubuntu)
Untuk install Nextcloud, kita harus mengaktifkan beberapa module Apache. Langkahnya adalah sebagai berikut
a2enmod rewrite
a2enmod headers
a2enmod env
a2enmod dir
a2enmod mime
Setelah diaktifkan kita lakukan reload webserver
systemctl restart apache2
Create Admin Account and Configure MySQL User (Install Nextcloud Ubuntu)
Setelah instalasi ekosistem sudah dilakukan, tahap selanjutnya adalah membuat user admin di NextCloud web dan memasukan user mysql sesuai yang sudah kita buat sebelumnya
Jika sudah tekan setup.
Increase PHP Memory Limit (Install Nextcloud Ubuntu)
Secara default pada awal instalasi PHP, memory limit diset 128MB. Untuk Nextcloud kita rekomendasikan 512MB untu perfoma yang bagus. Langkahnya adalah mengedit php.ini
nano /etc/php/7.4/apache2/php.ini
Cari memory_limit dengan cara menekan tombol Ctrl+W dan ketik memory_limit. Ubah nilainya menjadi 512MB
memory_limit = 512M
Untuk mengakomodir seting yang sudah kita buat maka kita akan reload konfigurasi
systemctl reload apache2
Konfigurasikan Redis Cache untuk NextCloud
Redis adalah sebuajh cache server yang digunakan untuk menaikan performa Nextcloud. Sekarang kita akan mengaktifkan memori cache untuk Instal Nextcloud ini, Jalankan perintah untuk menginstal server Redis.
apt install redis-server
Cek versi redis-server
redis-server -v
Output
Redis server v=4.0.9 sha=00000000:0 malloc=jemalloc-3.6.0 bits=64 build=9435c3c2879311f3
Sekarang kita konfirmasi status Redis
systemctl status redis
Jika sudah jalan, akan menampilkan output sebagai dibawah ini
redis-server.service - Advanced key-value store
Loaded: loaded (/lib/systemd/system/redis-server.service; enabled; vendor preset: enabled)
Active: active (running) since Mon 2022-03-28 00:29:58 UTC; 2 days ago
Docs: http://redis.io/documentation,
man:redis-server(1)
Main PID: 475592 (redis-server)
Tasks: 4 (limit: 9442)
Memory: 5.4M
CGroup: /system.slice/redis-server.service
└─475592 /usr/bin/redis-server 127.0.0.1:6379
Mar 28 00:29:58 nextcloud systemd[1]: Starting Advanced key-value store...
Mar 28 00:29:58 nextcloud systemd[1]: redis-server.service: Can't open PID file /run/redis/redis-server.pid (yet?) after start: Operation not permitted
Mar 28 00:29:58 nextcloud systemd[1]: Started Advanced key-value store.
From the output above Redis has been running, so we can use it to Install Nextcloud Ubuntu. Run redis automatically when the server reboots or shuts down. Ikuti perintah berikut ini
systemctl enable redis-server
To configure Redis in Install Nextcloud Ubuntu, we need to install the PHP extension Redis.
apt install php-redis
Check extension
php --ri redis
Output
redis
Redis Support => enabled
Redis Version => 5.3.2
Redis Sentinel Version => 0.1
Available serializers => php, json, igbinary
In the output above we can see that Redis is already enabled and if it is not enabled, follow the following command to do so.
phpenmod redis
After that do reload on Apache
systemctl reload apache2
After finishing installing and configuring Redis, now we will implement Redis Server into the Nextcloud Install Configuration. Go to the Install Nextcloud directory /var/www/nextcloud/config/config.php and edit the config.php file
nano /var/www/nextcloud/config/config.php
And follow the following configuration
'memcache.distributed' => '\OC\Memcache\Redis',
'memcache.local' => '\OC\Memcache\Redis',
'memcache.locking' => '\OC\Memcache\Redis',
'redis' => array(
'host' => 'localhost',
'port' => 6379,
),
Install ONLYOFFICE Document Server
Instal Docker
sudo apt install docker.io
Ketikan perintah ini untuk install (pakai port 8080 karena port default 80 telah dipakai apache)
sudo docker run -i -t -d -p 8080:80 onlyoffice/documentserver
kalo sudah, periksa pada browser dengan url <ip-address>:8080
Masuk ke Nextcloud sebagai admin
Klik icon user/admin di pojok kanan atas, pilih menu Aplikasi
Pilih menu Office & Text, lalu klik tombol Download and Enable.
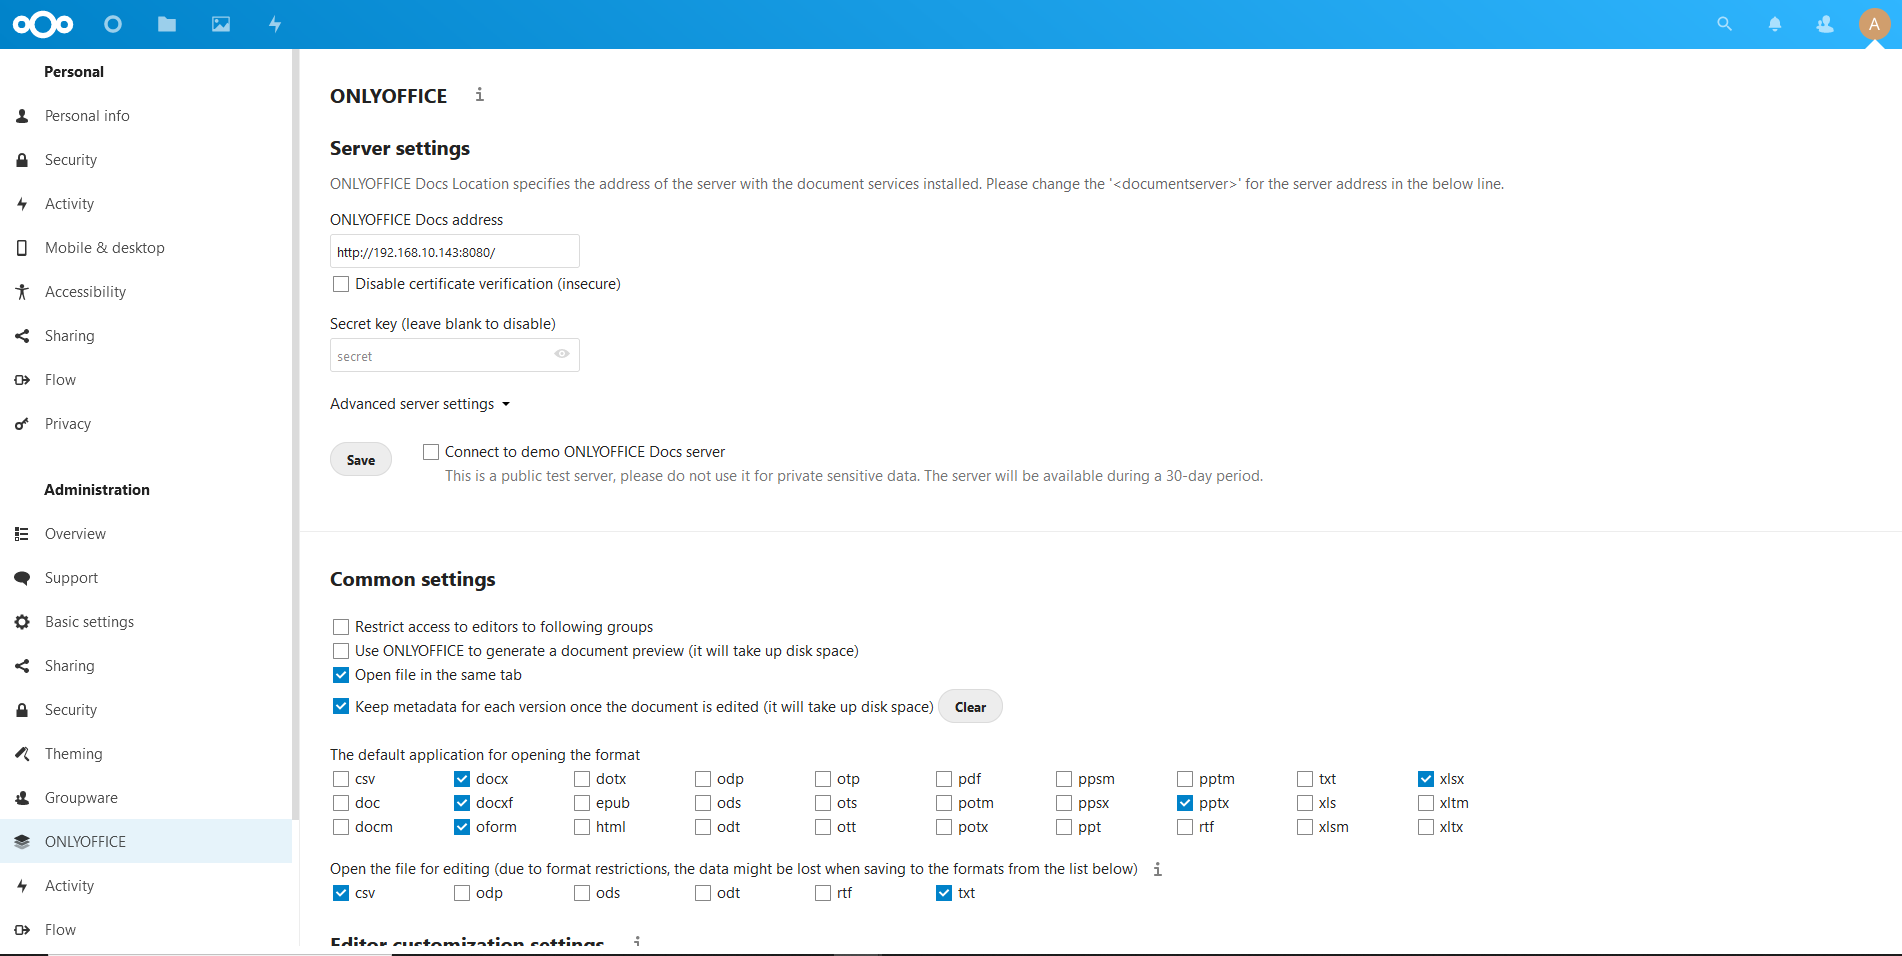
Setelah itu klik icon user/admin di pojok kanan atas, pilih menu Settings, Pilih menu ONLYOFFICE
Isikan Document Editing Service address dengan ip address server beserta portTambahkan di /var/www/html/nextcloud/config/config.php untuk konfigurasi redis dan only office
'allow_local_remote_servers' => true,
'onlyoffice'=>
array ( ‘verify_peer_off’ => true, ),
'memcache.distributed' => '\OC\Memcache\Redis',
'memcache.local' => '\OC\Memcache\Redis',
'memcache.locking' => '\OC\Memcache\Redis',
'redis' => array(
'host' => 'localhost',
'port' => 6379,
),


Tidak ada komentar:
Posting Komentar